Navigating Your First AI Project
AI can write the code, but YOU have to put it in the right place.
This guide uses the "Quote of the Day" app from our main tutorial. By the end, you'll know exactly where to paste code, how to run servers, and how to debug like a pro.
The Digital Workshop Analogy
Think of your computer as a chef's kitchen. AI is your sous-chef who can chop vegetables perfectly. But if you don't know where the stove is, or which pan to use, you still can't cook dinner.
In our "Quote App" project, you have three main stations:
The Workbench (VS Code)
Where you paste main.py for the backend and App.jsx for the frontend.
The Engine Room (Terminal)
Where you run commands like uvicorn to start your backend server.
The Showroom (Browser)
Where you see your beautiful "Get Quote" button in action.
1. The Editor: Your Command Center
VS Code looks like a spaceship control panel at first. But for our Quote App, you only need to master three zones.

Left: File Explorer. Center: Code Editor. Bottom: The Terminal (your secret weapon).
Zone 1: The File Explorer (Sidebar)
This is your map. It shows all the files and folders in your project. For the Quote App, you'll see:
my-first-ai-app/
├── backend/
│ └── main.py ← Your FastAPI code goes here
└── frontend/
└── src/App.jsx ← Your React code goes here
Cmd+B (Mac) or Ctrl+B (Windows) to toggle it.Zone 2: The Editor
This is where you paste the code the AI gives you. When you click on main.py in the sidebar, it opens here.
Cmd+S (Mac) or Ctrl+S (Windows). A white dot next to the filename means unsaved changes!Zone 3: The Integrated Terminal
This is where you talk to your computer. It's hidden at the bottom. Open it with Ctrl+` (backtick key, usually above Tab).
For our Quote App, you'll type commands like:
# To start the backend:
cd backend
uvicorn main:app --reload

# To start the frontend (in a NEW terminal tab):
cd frontend
npm run dev
2. The "Dev Loop": Your New Rhythm
Coding is a cycle. Every developer on the planet does this loop hundreds of times a day. Once you feel this rhythm, you'll be unstoppable.
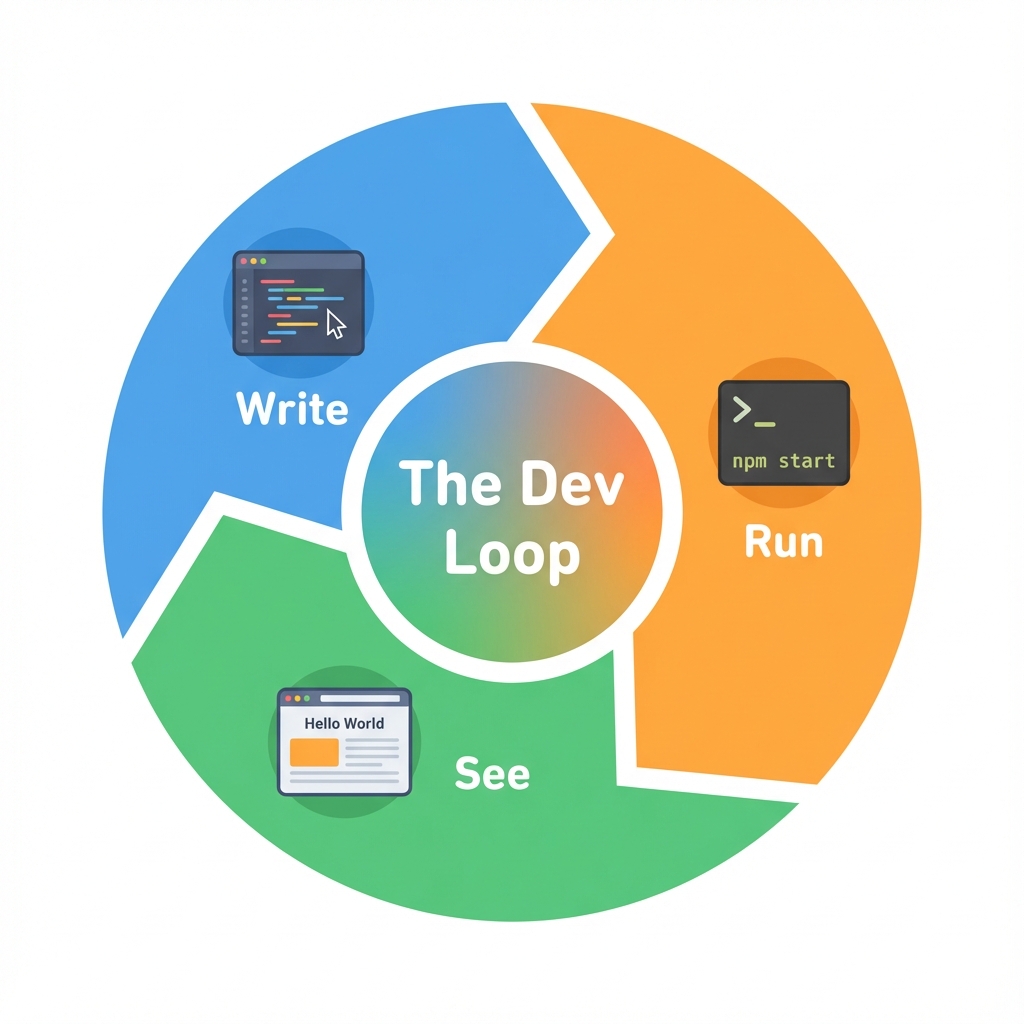
Write → Run → See → Fix. Repeat. This is the heartbeat of all software development.
WRITE (Paste the Code)
Ask your AI for the FastAPI code. It will give you something like this:
from fastapi import FastAPI
import random

app = FastAPI()
quotes = ["Believe.", "You can do it!", "Keep going."]

@app.get("/quote")
def get_quote():
    return {"quote": random.choice(quotes)}
Paste this into backend/main.py in VS Code. Save the file!
RUN (Start the Server)
Open the terminal in VS Code. Navigate to your backend folder and start the server:
cd backend
uvicorn main:app --reload
SEE (Check the Browser)
Open your browser and go to http://localhost:8000/quote. You should see:
{"quote": "Believe."}If you see this, congratulations! Your backend is alive. If not, go back to Step 1 and ask the AI "Why isn't this working?"
3. File Structure: The "Address System"
Imagine AI says: "Put this code in App.jsx." But where IS that file? Let's learn the address system.

Your project root has two main children: 'frontend' and 'backend'. Never mix them up!
Understanding Paths
A path is like an address. It tells the computer exactly where to find a file. Here are some examples from our Quote App:
| File | Full Path | What It Does |
|---|---|---|
| main.py | my-first-ai-app/backend/main.py | The "brain" of your app (FastAPI) |
| App.jsx | my-first-ai-app/frontend/src/App.jsx | The "face" of your app (React UI) |
| package.json | my-first-ai-app/frontend/package.json | List of frontend dependencies |
npm install while you're inside the backend folder. Always check your terminal path! It shows at the start of each line.Pro Tip: Running Two Servers at Once
For the Quote App, you need BOTH the backend AND frontend running simultaneously. Here's how:
Terminal Tab 1: Backend
cd my-first-ai-app/backend
uvicorn main:app --reload
Runs on: http://localhost:8000
Terminal Tab 2: Frontend
cd my-first-ai-app/frontend
npm run dev
Runs on: http://localhost:5173
You're Ready!
You now understand the kitchen. Time to cook! Head back to the main tutorial and build your Quote App from scratch.
Build the Quote App